
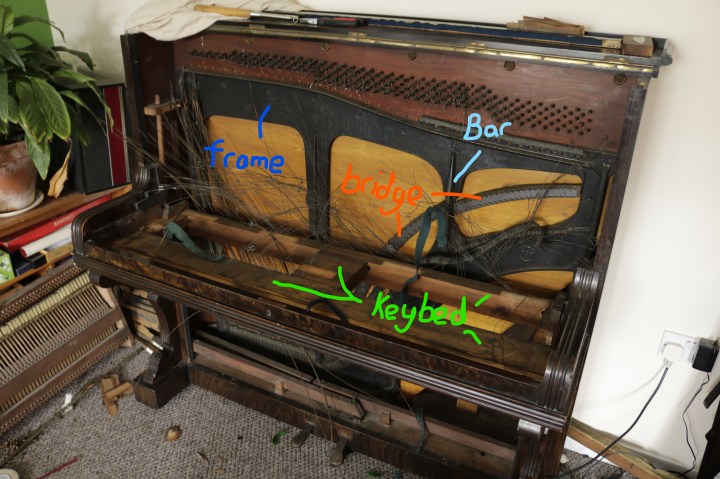
First of all let me apologise for the lateness of this post. Today’s post is about removing the iron frame from the piano. Here is a photo showing the important terminology.
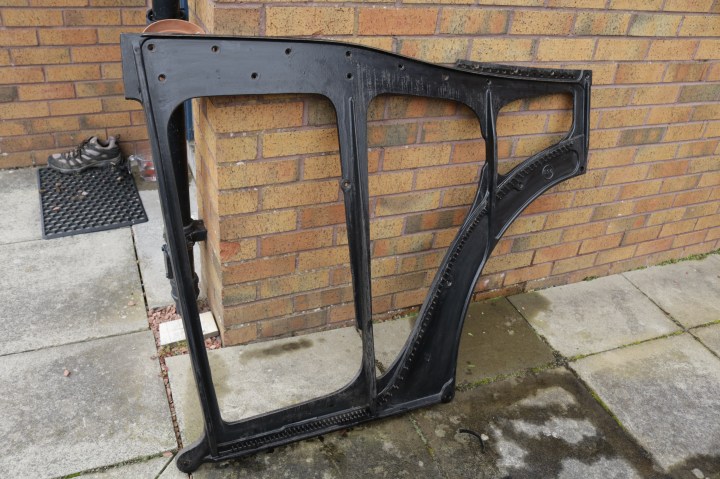
Removing the frame was a tricky process on my own, next time I think I would like some help or a hoist. The main reason the process was so difficult is because the bars on the frame didn’t allow it to pass the key bed and the key bed would not come apart and away from the piano. This meant that the key bed had to be cut to allow the metal frame to come out. An added difficulty was the bridge which also made it difficult to lift the frame high enough. Also the weight of the metal frame (it is solid cast iron) made it awkward to remove. Finally after some swearing and sweating I managed to remove the iron frame. This was cleaned and I have another project in mind for this in the future.
Once the frame was out I had to repair the key bed. I wanted to have a solid foundation for the keys to eventually sit back on. Because the key bed was sawn I had to put some wooden packing shims between the two parts. This was a simple job and went smoothly. There was also another split in the key bed which I didn’t cause so this too was glued back.
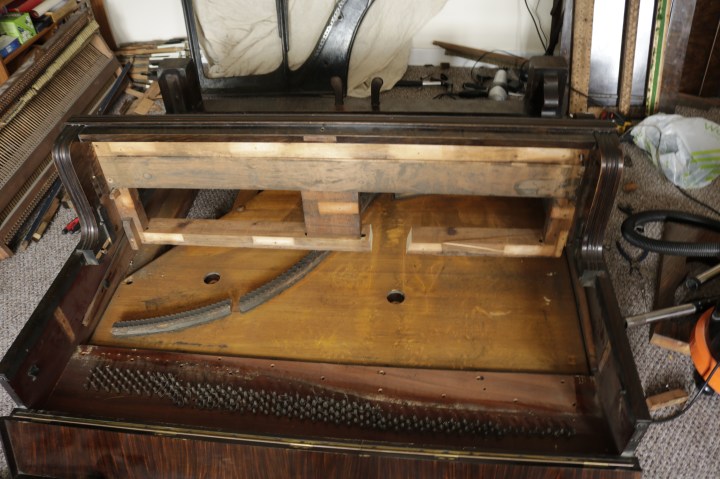
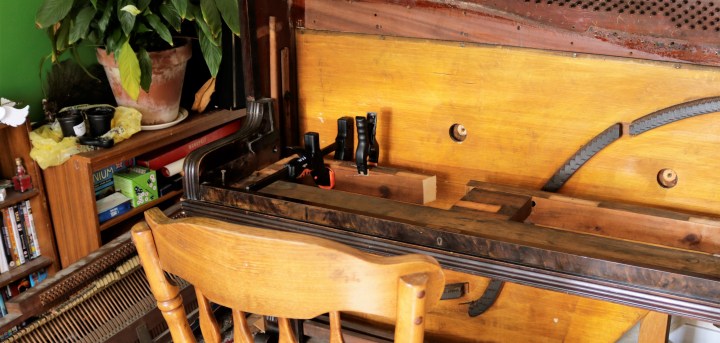
Once all the glue had dried the piano wooden shims were chiselled and sanded flush and everything was checked for levelness (if that isn’t a word, it is now). I then measured some reclaimed plywood to use as a new key frame. I would do this differently next time and use the original parts of the frame and arranging and lining up the keys was a laborious job. The frame will need to be recessed into the key bed I think. I’ll detail this when I do it in the future.
The piano finish was then stripped back to bare wood and refinished. This is the subject for the next post.

Thanks for this. One of my students has a piano stored in their garage. They wanna try to sell it, but I told them it is not worth the money.
LikeLike